
This article was originally written in Chinese and translated into English by AI.
OpenClaw has become incredibly popular lately, so I decided to join the trend.
This article explains how to install OpenClaw and the precautions you should take.
This is the 197th article published by the Technical Miscellany Shop WeChat official account.
Estimated reading time: about 10 minutes.
Completing the entire process step by step takes about 20–30 minutes.
The terms “lobster” and “OpenClaw” will be used interchangeably below to refer to this emerging software. To be safe, this article begins with the precautions before moving on to the installation guide.
Precautions and Security Warnings
Configuring OpenClaw currently requires a certain level of computer knowledge. Using OpenClaw will also incur some costs. Users often grant OpenClaw extensive permissions, including access to account credentials and the ability to create, delete, modify, and read files. Improper use or a malicious Skill can therefore result in irreversible losses and information-security risks.
An interesting contradiction has been circulating online: people who are capable of using OpenClaw effectively are usually capable of installing it themselves and do not need an online tutorial. Meanwhile, people who need to read an installation guide often have few practical use cases for OpenClaw and may not need it in daily life.
For most people, installing OpenClaw is mainly a way to try something new. Its practical value may be limited, and once the novelty wears off, you still have to figure out how to uninstall it cleanly.

Therefore, you may not actually need the 🦞 lobster to boost your productivity. Free AI products such as Doubao or Qwen are sufficient for everyday use. For personal AI agents, it may be better to wait until more accessible products become widely available.
About OpenClaw
OpenClaw is a bridge—a hub that connects capabilities such as web search and file access. OpenClaw itself does not include an AI large language model, and an ordinary computer is sufficient to run it. OpenClaw delegates its reasoning to other large language models.
When configuring OpenClaw for the first time, you need to choose a large language model provider, such as ChatGPT, MiniMax, or Gemini. The provider charges you according to the number of tokens you use.
When using OpenClaw, we often install various Skills. A Skill is a predefined set of operational logic and instruction templates, such as how to work with Word and Excel files, manage code, or search the web.
Every time you talk to OpenClaw, it combines the descriptions of installed Skills, previous conversation history, other important documents such as SOUL.md, MEMORY.md, and IDENTITY.md, and your request, then sends them to the large language model. This process may be repeated multiple times. It often consumes a large number of tokens, making OpenClaw expensive to use.
Installation
The official documentation already explains the installation process clearly:
https://docs.openclaw.ai/start/getting-started
The installation command is only one line. The official recommendation is to use Linux, macOS, or Windows with WSL2. Open a terminal, run the following command, and follow the prompts to complete the installation:
curl -fsSL https://openclaw.ai/install.sh | bash
(On a native Windows system, open PowerShell and run:
iwr -useb https://openclaw.ai/install.ps1 | iex
to install OpenClaw.)
The following example demonstrates the installation process on an Ubuntu system hosted on Tencent Cloud.
Run curl -fsSL https://openclaw.ai/install.sh | bash, then wait while the script installs the required runtime environment.
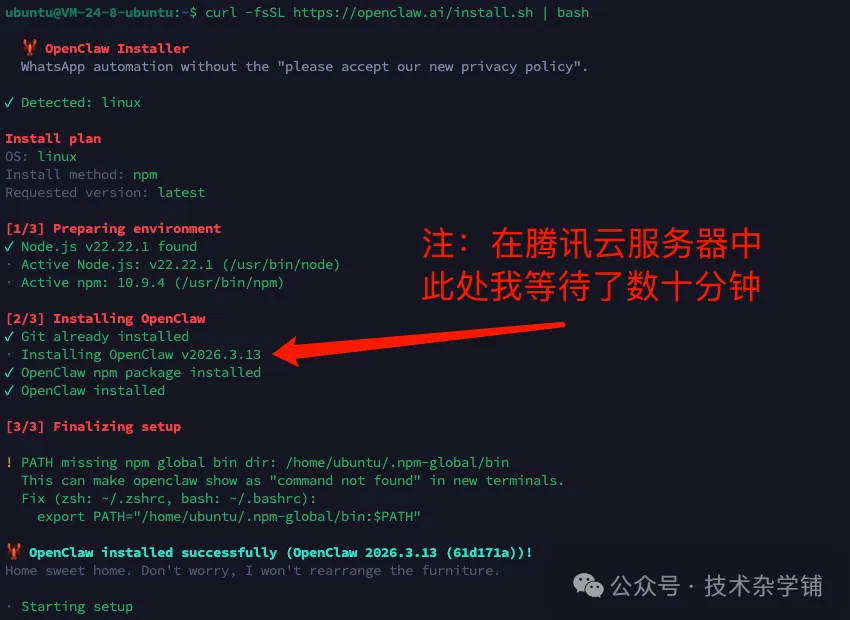
Note: OpenClaw installation speed depends on your network configuration, particularly during the step:
Installing OpenClaw v[version number]
This step may take a long time. The installation finished within ten minutes on my personal laptop while connected through a proxy, but a Tencent Cloud server in Beijing remained stuck at “Installing OpenClaw” for dozens of minutes. Be prepared for a long wait, or manually switch the npm registry or configure a suitable proxy.
Once OpenClaw is installed, the configuration stage begins.
The first screen is a security notice warning users to protect their information and use the tool carefully.
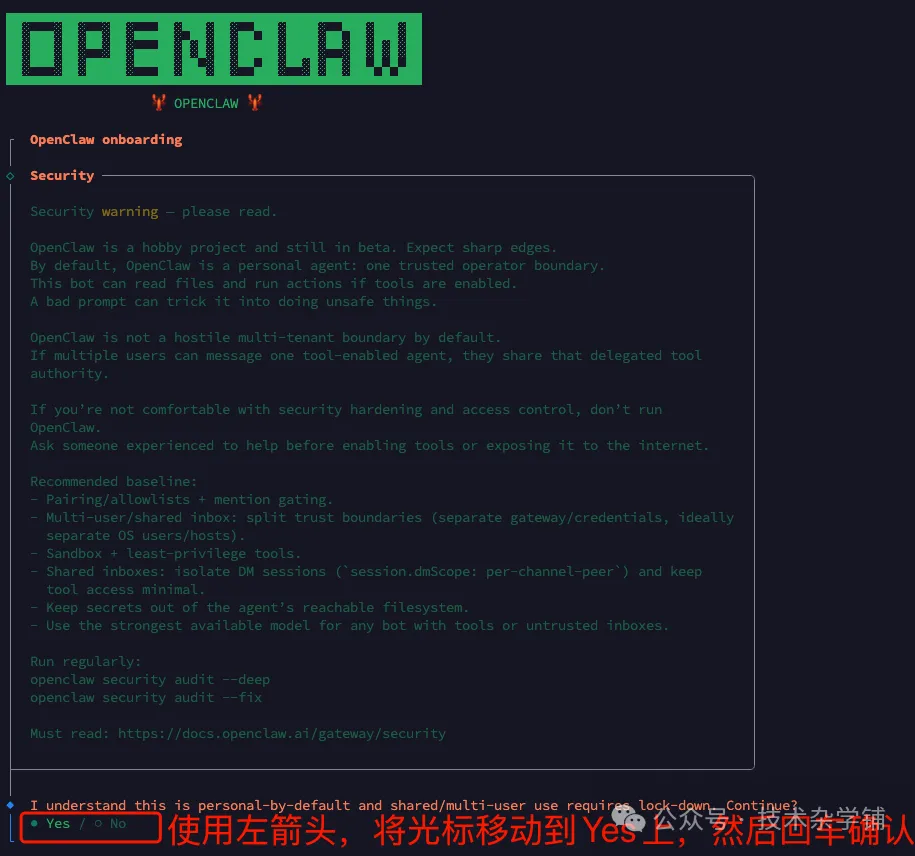
Use the left arrow key to move the selection to Yes, then press Enter to confirm.
Next, select the default “QuickStart” option to skip most of the detailed configuration and proceed with a faster setup.

You will then reach the most important—and potentially most expensive—step: choosing which AI platform to use. Without completing this step, the lobster cannot think. The exact configuration process varies by model.
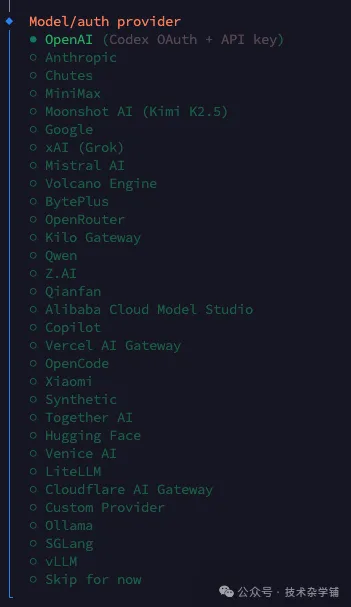
If you already subscribe to ChatGPT Plus, you can select OpenAI and follow the prompts to sign in to your ChatGPT account, avoiding additional API usage fees.
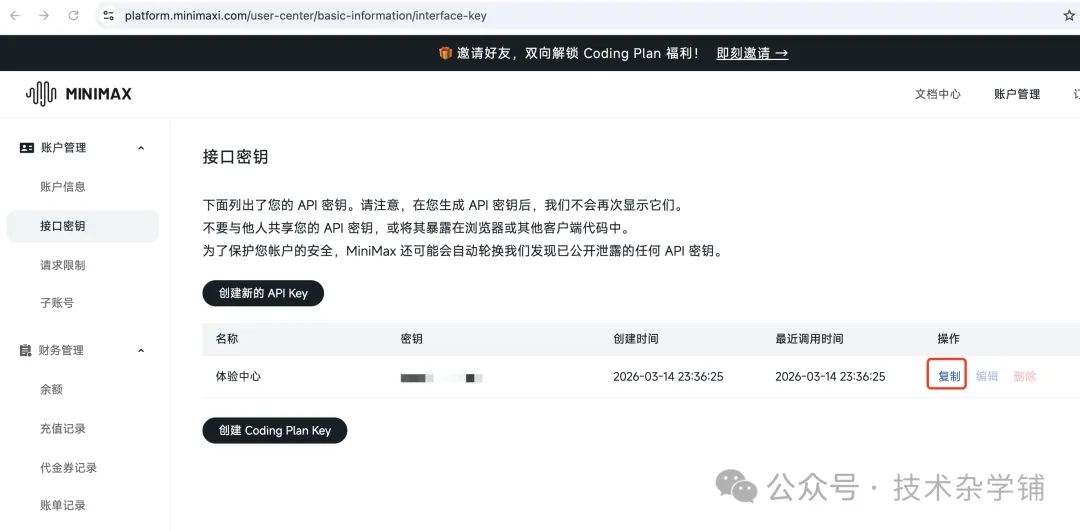
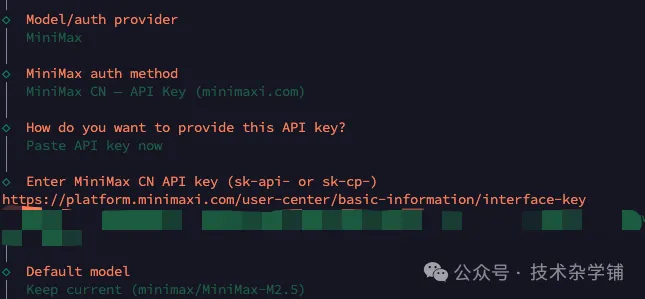
If you have no model preference and are unsure which one to choose, MiniMax is recommended. It is a cost-effective Chinese model and one of the most frequently used models with OpenClaw.
Using MiniMax as an example, follow the prompts to create an account on the MiniMax website, then enter your MiniMax API key in the terminal.
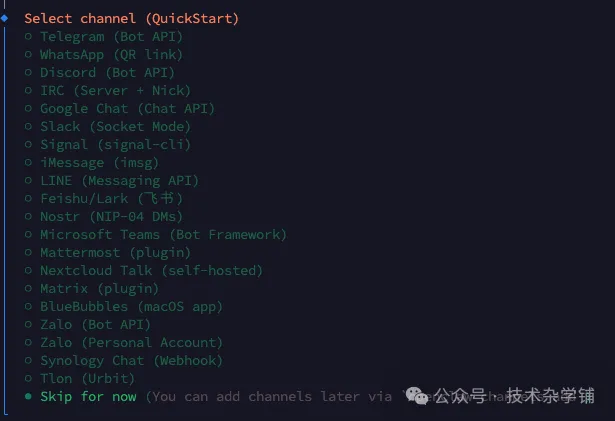
The next step is to choose the chat application you want to use with the lobster. Once configured, you can talk to the lobster through popular international messaging apps and instruct it to operate your computer. The official installation process does not currently support WeChat or QQ, so we will skip this step by selecting “Skip for now.”
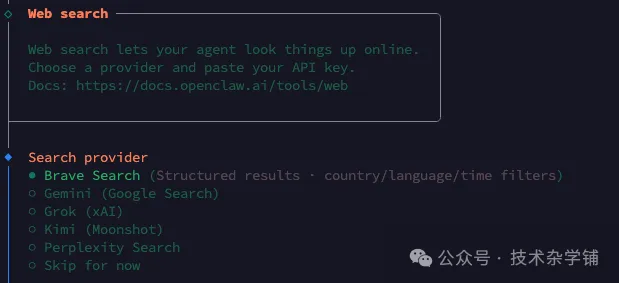
Next comes web search. Configuring it gives the lobster stronger capabilities for finding information online. You will again need to register an account with the corresponding platform and enter the API key in the terminal.
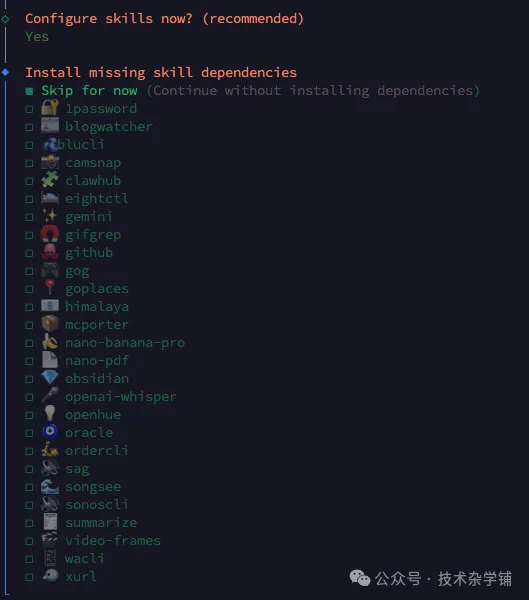
Next, configure Skills. You can install official preset Skills for tasks such as password management, connecting to GitHub to work with code, and processing PDF files. Use the up and down arrow keys to move the cursor and the space bar to select or deselect Skills.
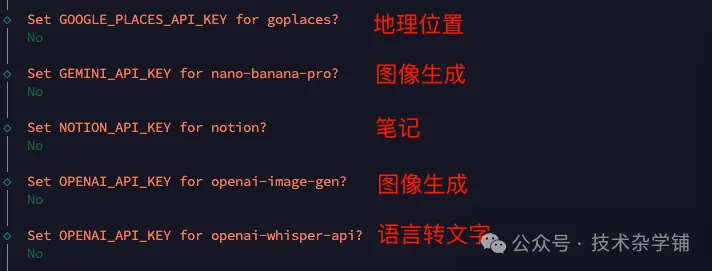
The installation script will then ask whether you want to provide various API keys to configure additional features. Select Yes if you want a feature, register an account on the corresponding website, and obtain an API key. Otherwise, you can select No for all of them.
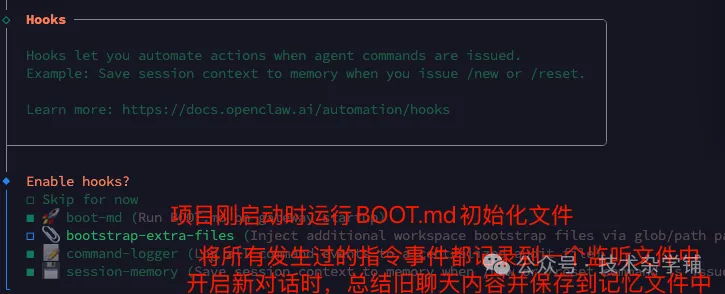
The final step is to configure Hooks. Hooks determine whether the lobster performs additional actions at certain moments, such as when a conversation begins, a conversation is reset, or a special command is executed.
After completing the steps above, the lobster is fully installed. Its default port is 18789.
To ensure that you—and not someone else—are the person signing in to and controlling the lobster, the system generates a temporary password called a token. Add this token to the URL to access your lobster.
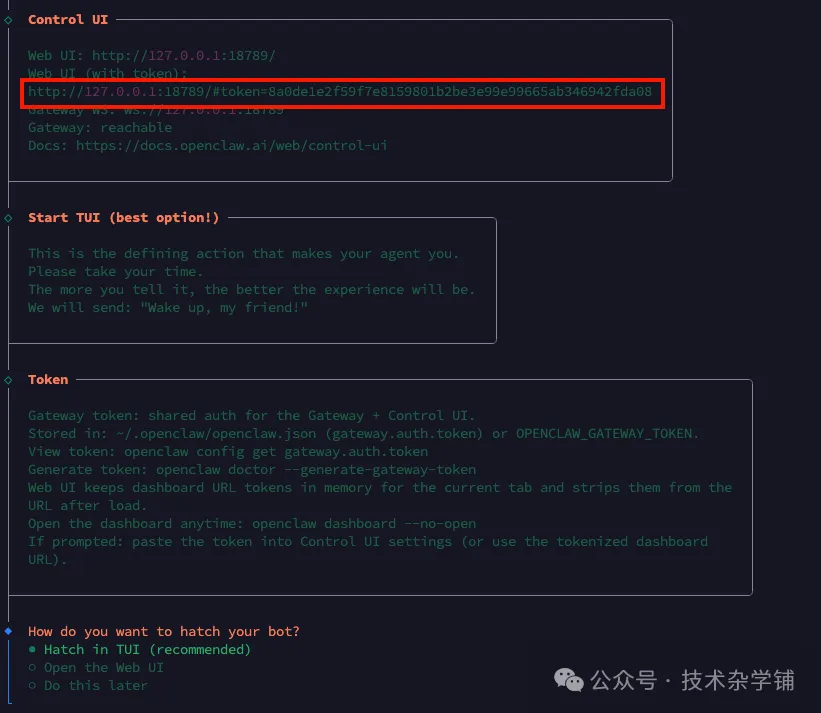
If you installed the lobster on your local computer, visit:
http://localhost:18789/#token=<token generated by the system>
to open the web interface.
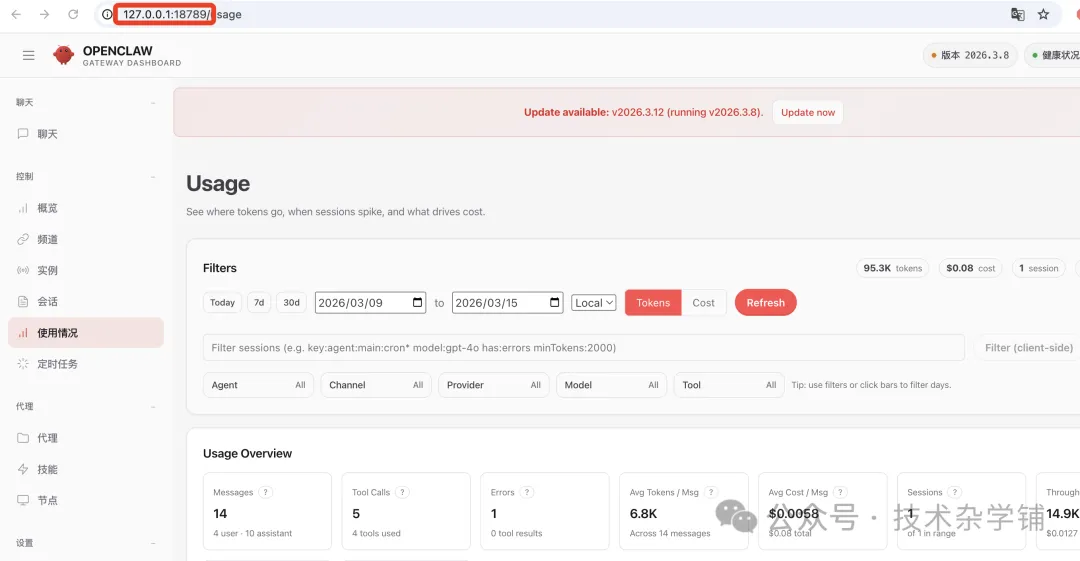
If the lobster is installed on a cloud server, try:
http://<server IP>:18789/#token=<token generated by the system>
Remember to open port 18789 in the cloud server firewall, or the connection will be refused.
Have fun with your lobster!